Residential Architecture
-

How Early Design Decisions Prevent Expensive Changes Later
Designing a custom home can be thrilling but costly changes occur if adjustments are made after…
-
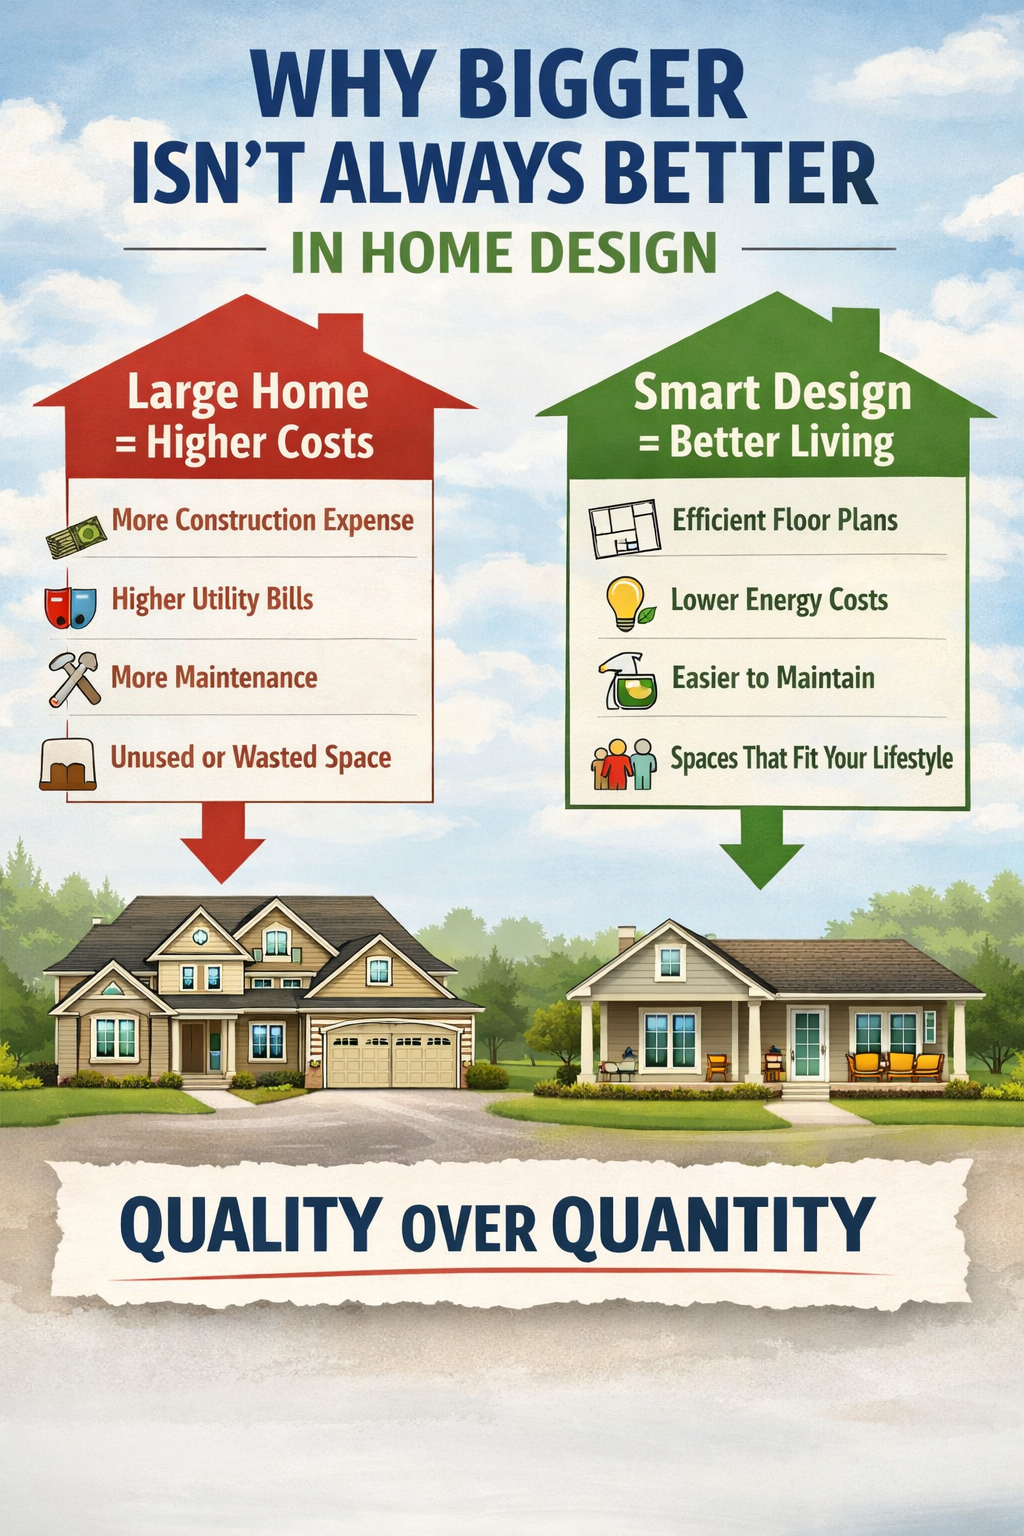
Why Bigger Isn’t Always Better in Home Design
When planning a custom home, homeowners often mistakenly believe that larger equals better. However, effective design…
-
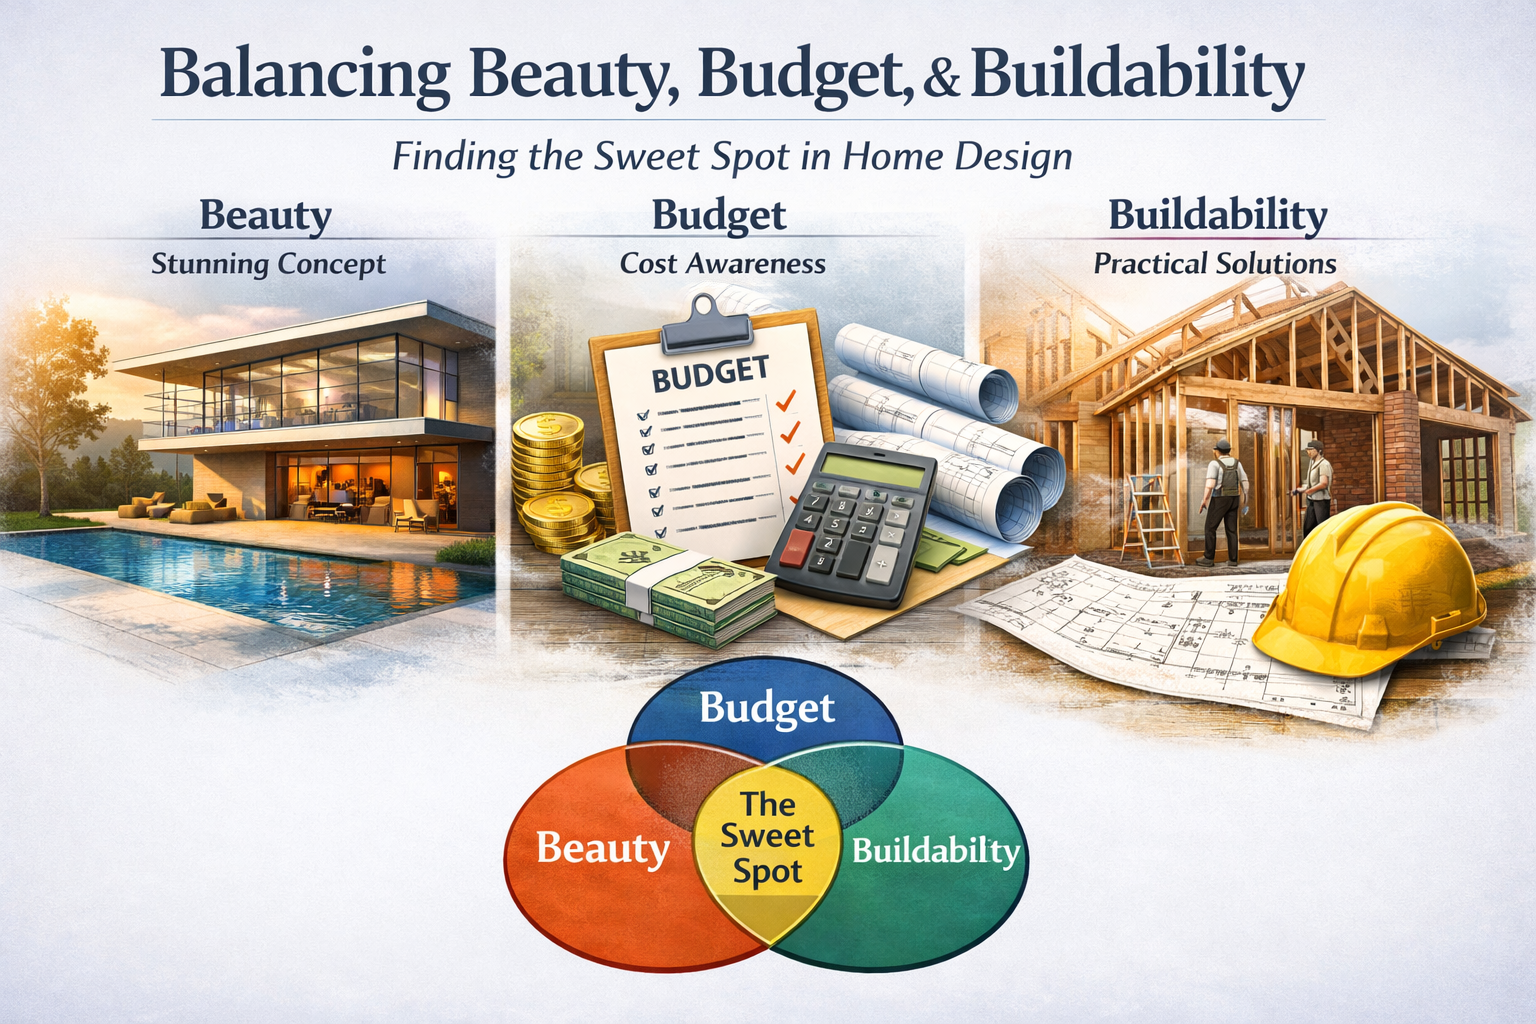
Balancing Beauty, Budget, and Buildability
Good home design must balance beauty, budget, and buildability. While inspiration drives initial plans, practical considerations…
-
Why Your Budget Should Shape Your Design – Not the Other Way Around
When homeowners start design projects, they often focus on inspiration but neglect budget clarity, leading to…
-

Why Good Drawings Matter More Than You Think
Homeowners often overlook the importance of construction drawings, viewing them merely as paperwork. However, these drawings…