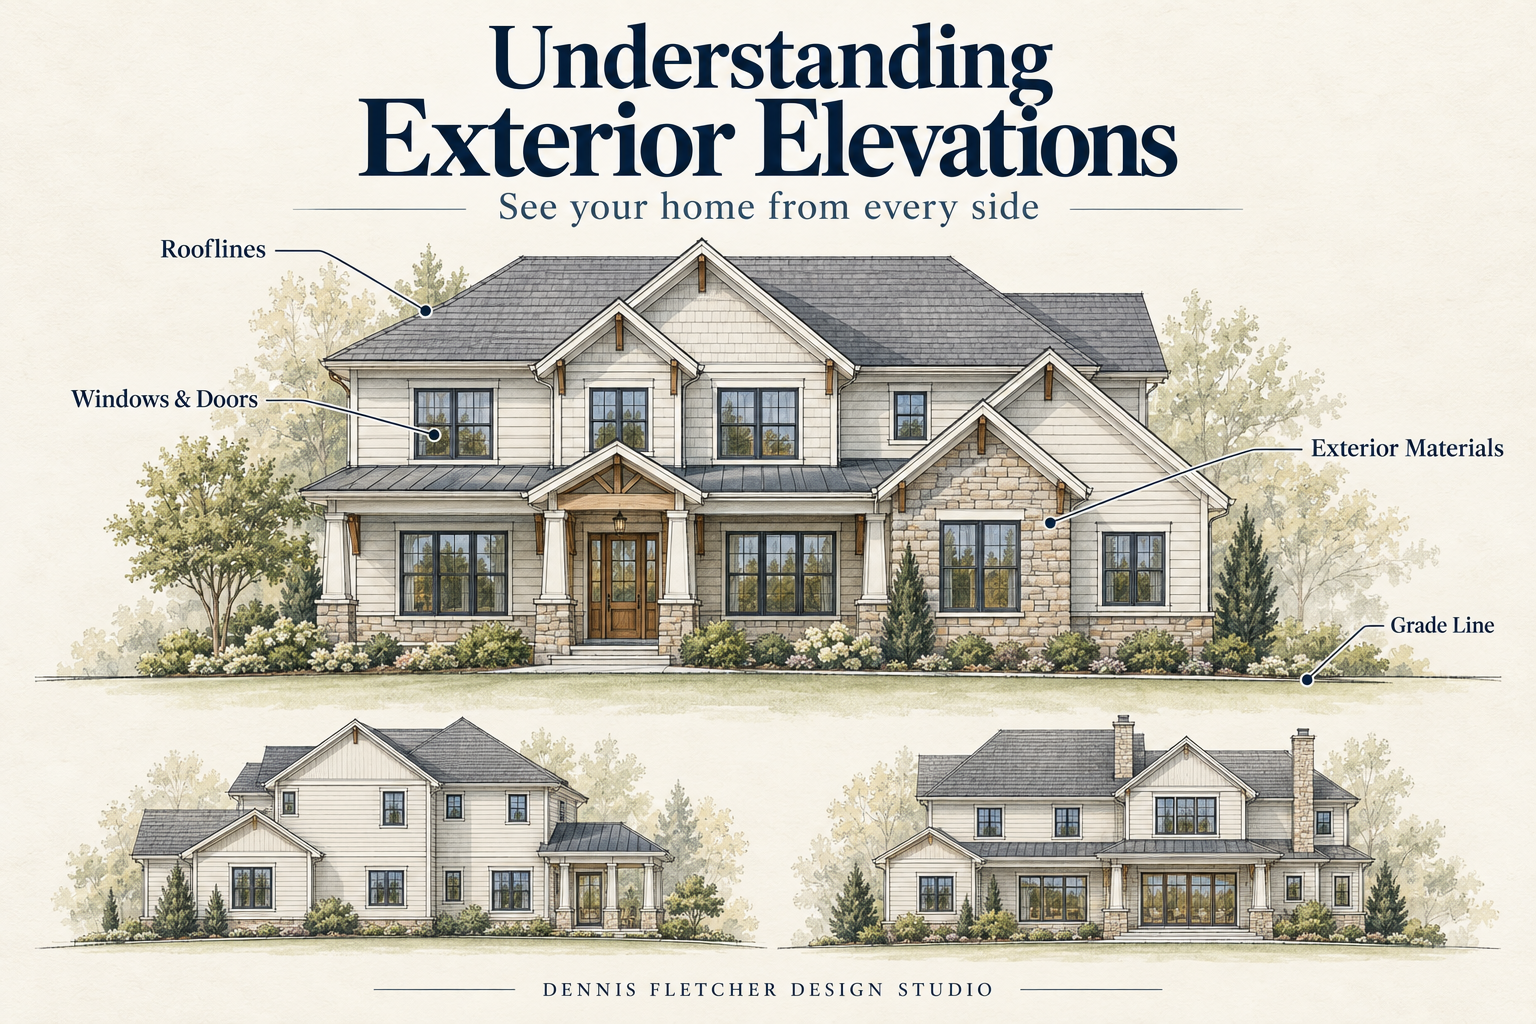
You may love the arrangement of the rooms in your floor plan and still have questions about the outside of your home. How tall will it feel? Will the windows look balanced? Where does the siding change to brick or stone? What happens at the back of the house when the land slopes away?
Exterior elevations help answer those questions. They show the outside faces of the home and explain how its rooflines, openings, materials, and vertical dimensions work together. Learning to read them helps you review the design with more confidence before those decisions reach the jobsite.
This article builds on How to Read House Plans: A Homeowner’s Guide to Understanding Construction Drawings. In that guide, I explain how the sheets form a coordinated communication system. Here, we will focus on the drawings that describe your home from the outside.
What is an exterior elevation?
An exterior elevation is a flat, straight-on drawing of one side of a building. Imagine standing directly in front of that side, with its features shown without the perspective effect that makes distant objects appear smaller in a photograph.
A typical home has front, rear, and two side elevations. More complicated shapes may need additional views to explain recessed walls, courtyards, or other surfaces that are hidden in the main drawings.
Elevation titles may use front and rear, left and right, or compass directions such as north and south. Check the floor plan and site information to understand which wall each view represents. If left and right are unclear, ask which viewpoint the designer is using.
The word elevation can also mean the height of a particular point relative to a reference level. On the same sheet, you may see an elevation drawing and an elevation marker identifying a floor or roof height. The surrounding labels tell you which meaning applies.
Read the overall shape before the small details
Start by looking at the silhouette: the broad outline of the house. Notice the main roof, lower porch or garage roofs, taller wall areas, and any projecting or recessed portions.
Then compare all sides. The front may present a welcoming entry while the rear opens toward outdoor living spaces. The sides may contain fewer windows because of room arrangements, privacy, or other project conditions. Each view contributes to the same home, even when the faces are intentionally different.
A flat elevation does not show depth as clearly as a perspective image. Two features that look close together on the page may sit at different distances from you. Use the floor plan or a three-dimensional view to understand how far a porch, garage, or wall projects.
Follow the rooflines and their labels
Roof shapes strongly influence the character of a home. A gable is the triangular wall area beneath two sloping roof surfaces. A hip roof slopes down toward the exterior walls on all sides. A shed roof has one main slope. Your home may combine several forms.
Common labels include the ridge, the high line where roof surfaces meet; the eave, the lower roof edge; and the overhang, the portion extending beyond the wall. A dormer is a projection from a sloping roof that commonly contains a window.
You may see a roof slope expressed as 6:12. That means the roof rises 6 inches for every 12 inches of horizontal run. It describes the slope, not the roof’s overall height. Look for the note or symbol in your particular set rather than trying to estimate the slope from its appearance.
Elevations help you see the roof’s exterior form. A roof plan, sections, and structural information may be needed to explain its layout and construction. If the roof seems different between sheets, ask the designer to clarify the relationship.
Match windows and doors to the rooms inside
In How to Read a Floor Plan, we looked at openings from above. Elevations add another layer: their height, shape, alignment, and relationship to the exterior walls.
Look at the tops and bottoms of windows, their proportions, and their placement near doors or corners. Notice whether a group of windows is intended to align and whether a porch roof covers part of an opening.
Then return to the floor plan. Which room sits behind each window? A kitchen window may need to coordinate with counters and cabinets. A bedroom window affects furniture arrangements and privacy. A large window facing a beautiful view also deserves a conversation about sunlight and interior use.
Window and door marks may direct you to a schedule—a table listing information about the openings. The elevation alone may not identify the exact product, glass, operation, or every required dimension. Ask where those decisions are recorded and which ones remain open.
If you want to move or resize a window, review both the inside and outside effects with your designer. A small change on one drawing may require updates to several parts of the plan set.
Understand material notes and patterns
Drawings often use lines or patterns to distinguish siding, masonry, roofing, and other finishes. A pattern is a visual cue; the accompanying notes and specifications explain what is intended.
Look for arrows connecting a material label to a specific surface. Check where materials begin and end, including wall corners, porch areas, foundation walls, and the transition between upper and lower stories.
For example, a front elevation may show a masonry accent beside the entry. Ask whether it wraps around the corner or stops at the front face. That decision affects appearance, coordination, and the builder’s pricing assumptions.
A label such as “siding” may leave the exact product, profile, finish, or color undecided. Keep a written list of selections that still need confirmation. A shaded drawing or rendering should not be the only record of an agreed material.
Use height markers to understand vertical relationships
Horizontal reference lines and height labels help connect the floors, walls, and roof. They may identify finished floor levels, the top of a wall, or a roof ridge. These markers make vertical relationships easier to compare across the drawings.
Some drawings use an assumed reference such as 0′-0″ or 100′-0″ for a floor level. That number is not necessarily an actual surveyed height above sea level. Ask what the reference means and how it relates to the site information.
Exterior wall height and interior ceiling height are related, but they are not interchangeable. Floor assemblies, ceiling construction, and roof geometry affect the space inside. Sections provide the additional information needed to understand those relationships.
If a height matters to you—such as the entry proportions or the space beneath a porch roof—ask your designer to explain the relevant dimensions. Use written dimensions; a reduced print or screen image may not preserve the drawing’s scale.
Pay attention to the ground line
The ground line, often called grade, shows where the land meets the building. An elevation may distinguish existing grade from proposed finished grade. Check the notes to understand what has been established and what is still conceptual.
On a sloping lot, one side of a foundation may be mostly concealed while another is exposed. The rear view might show a basement door and full-height windows even though the front appears to be a single-story home.
Review exterior steps, landings, porches, and decks in relation to the ground. Ask how you will reach the yard and whether the drawings reflect the actual site information available for the project.
An exterior elevation helps explain these relationships, but it does not replace a site or grading plan. Drainage, building placement, and site-specific heights need coordinated information. If the ground line is illustrative, make sure everyone understands that before relying on it for construction decisions.
Know what an elevation leaves to other drawings
Elevations show exterior form and visible features. They do not explain every hidden connection, wall layer, or structural member. A material that looks simple on the page may require several coordinated components to perform properly.
References on the sheet can direct you to sections or enlarged details. Follow those references when a feature needs explanation, such as a porch connection or a change between exterior materials. Ask about conflicting information instead of selecting one sheet as the answer.
A rendering can help you picture depth, color, and the overall impression. Review it alongside the current drawings, and confirm which illustrated features are included. Landscaping, decorative elements, or finishes may be shown for context without being fully specified.
A simple homeowner review checklist
- Identify every elevation and match it to the floor plan.
- Review all sides of the home, including the rear and less visible walls.
- Discuss the overall shape, rooflines, and porch proportions.
- Match windows and doors to the rooms, furniture, and activities inside.
- Confirm material locations, transitions, and selections still to be made.
- Ask what the height markers and grade lines mean for your project.
- Review how steps, landings, and outdoor spaces connect to the ground.
- Record questions with the sheet number and the feature involved.
- Confirm that agreed changes appear in the current coordinated set.
At Dennis Fletcher Design Studio, I encourage homeowners to take time with these drawings. You do not need to read them like a builder. You need to understand the decisions they describe and feel comfortable asking about anything that does not match your expectations.
A thoughtful elevation review helps connect the home you imagine with the information your builder will use. It also gives us an opportunity to resolve questions while changes can still be considered as part of the design process.
Thinking about building, adding on, or redesigning your home?
If you’re early in the planning process—or even just trying to figure out where to start—I offer a free 30-minute phone consultation to talk through your ideas, answer questions, and help you understand next steps.
📧 Email: info@dennisfletcherdesignstudio.com
📅 Schedule your free consultation here:
👉 https://calendly.com/ahomespecialist2020/phone-consultation
Follow me on the following Social Media Pages:
Facebook | Instagram | TikTok | YouTube
Leave a Reply